Getting Started
Getting Started
This page is intended to provide a quick tutorial on how to get started with chart editing in DyNode.
Download & Installation
Standard Download
You can download the latest version of DyNode for your platform from the Home page.
After downloading, extract the compressed file and run DyNode.exe to start DyNode.
Important
Starting from version 0.1.6, DyNode has removed support for 32-bit systems.
If you require support for these systems, you may consider downloading an earlier supported version.
Data Collection / Privacy
Starting from DyNode 0.1.16, we have introduced minimal anonymous data collection. We only collect:
- The current DyNode version number
- Feature usage statistics to help improve development
This information will never be associated with your personal identity, and we will not transmit any form of personal data.
You always have full control. If you prefer not to share this information, you can completely disable it at any time in the Configuration.
Building from Source
Building the project requires the latest version of Gamemaker. Use either the GMS2 VM or GMS2 YYC compilation method. If using GMS2 YYC, you will also need Visual Studio 2022 and to configure Gamemaker accordingly as described here. You can obtain Gamemaker from its official website or its Steam page. For non-commercial use, no paid license is required. DyCore (the C++ core extension used by DyNode) will also be built during the main project compilation process, which also requires you to install the CMake, LLVM, and Ninja toolchains.
Getting Started with DyNode
Tip
If you are ready to create a brand new project and use DyNode to craft new charts, this section will guide you through the basic steps.
Follow these simple steps to start creating a chart:
- Create a Project.
- Set up the chart’s Timing. See Timing for details.
- Toggle the display of beat lines. See Grid Snapping and Beat Lines.
- Edit the chart. See Chart Editing for details.
- Save the Project.
- Export the chart as a .xml file for testing on a device. See Chart Export for details.
- Publish the exported .xml chart.
Your chart is complete!
Getting Started from Dynamaker
Tip
If you have used Dynamaker before and are familiar with its basic operations, and you wish to import an existing chart from Dynamaker, then start here.
Basic Operations
Most of the basic operations in DyNode are modifications and enhancements of those in Dynamaker. Therefore, if you are familiar with Dynamaker, you should be able to quickly get started with DyNode.
Here are the main differences between DyNode and Dynamaker:
- In addition to double-click snapping, notes can be moved directly by dragging with the mouse.
- For Hold notes, moving the head and tail are separate. To move the entire Hold, hold Ctrl and drag the head. In multi-select mode, Hold notes are moved as a whole.
- When placing notes, click and drag with the left mouse button to adjust note width, then release to place.
- There are five editing modes, switched by the number keys 1–5.
- The first four modes are similar to Dynamaker; the fifth mode is Playback mode, which is the default mode when entering the editor. In Playback mode, only previewing is enabled, and all editing functions are disabled. Therefore, after entering the editor, switch to mode 4 to start editing.
- C / V change the beat subdivision.
- The number displayed at the top-left of a Note by default is not its Bar number but the time (in milliseconds) at which it occurs.
- You can use Ctrl with click or drag-select to multi-select or deselect notes.
- You can use Ctrl+C/X/V/Z/Y for copy, cut, paste, undo, and redo operations.
- You can use Ctrl + Mouse Wheel to quickly adjust the note flow speed. If notes are selected, this can be used to batch adjust their width.
- You can use Ctrl+C / V to copy the width of a single note and then batch apply it to selected notes.
- You can use Ctrl + (optionally Shift +) Arrow Keys for fine-tuning the positions of selected notes.
- Right-click dragging can be used to quickly switch editing sides.
Other basic operations and key mappings are mostly the same as in Dynamaker.
Importing Charts from Dynamaker
DyNode provides a way to directly import charts from Dynamaker. Below are two ways to import charts.
In DyNode, a project is a distinct concept. All project information is stored in JSON format in files with a .dyn extension. See Project and File Formats for details.
On the start screen, you can select "Open Project" and choose the chart you want to import. This will cause DyNode to quickly create a new project and automatically associate and load the largest music/image file in the chart's folder. DyNode has many similar convenient features, so we recommend that you keep your project, chart, music, and other related files in a separate folder, using different folders for different projects.
You can also choose "Create Project" to manually import chart files.
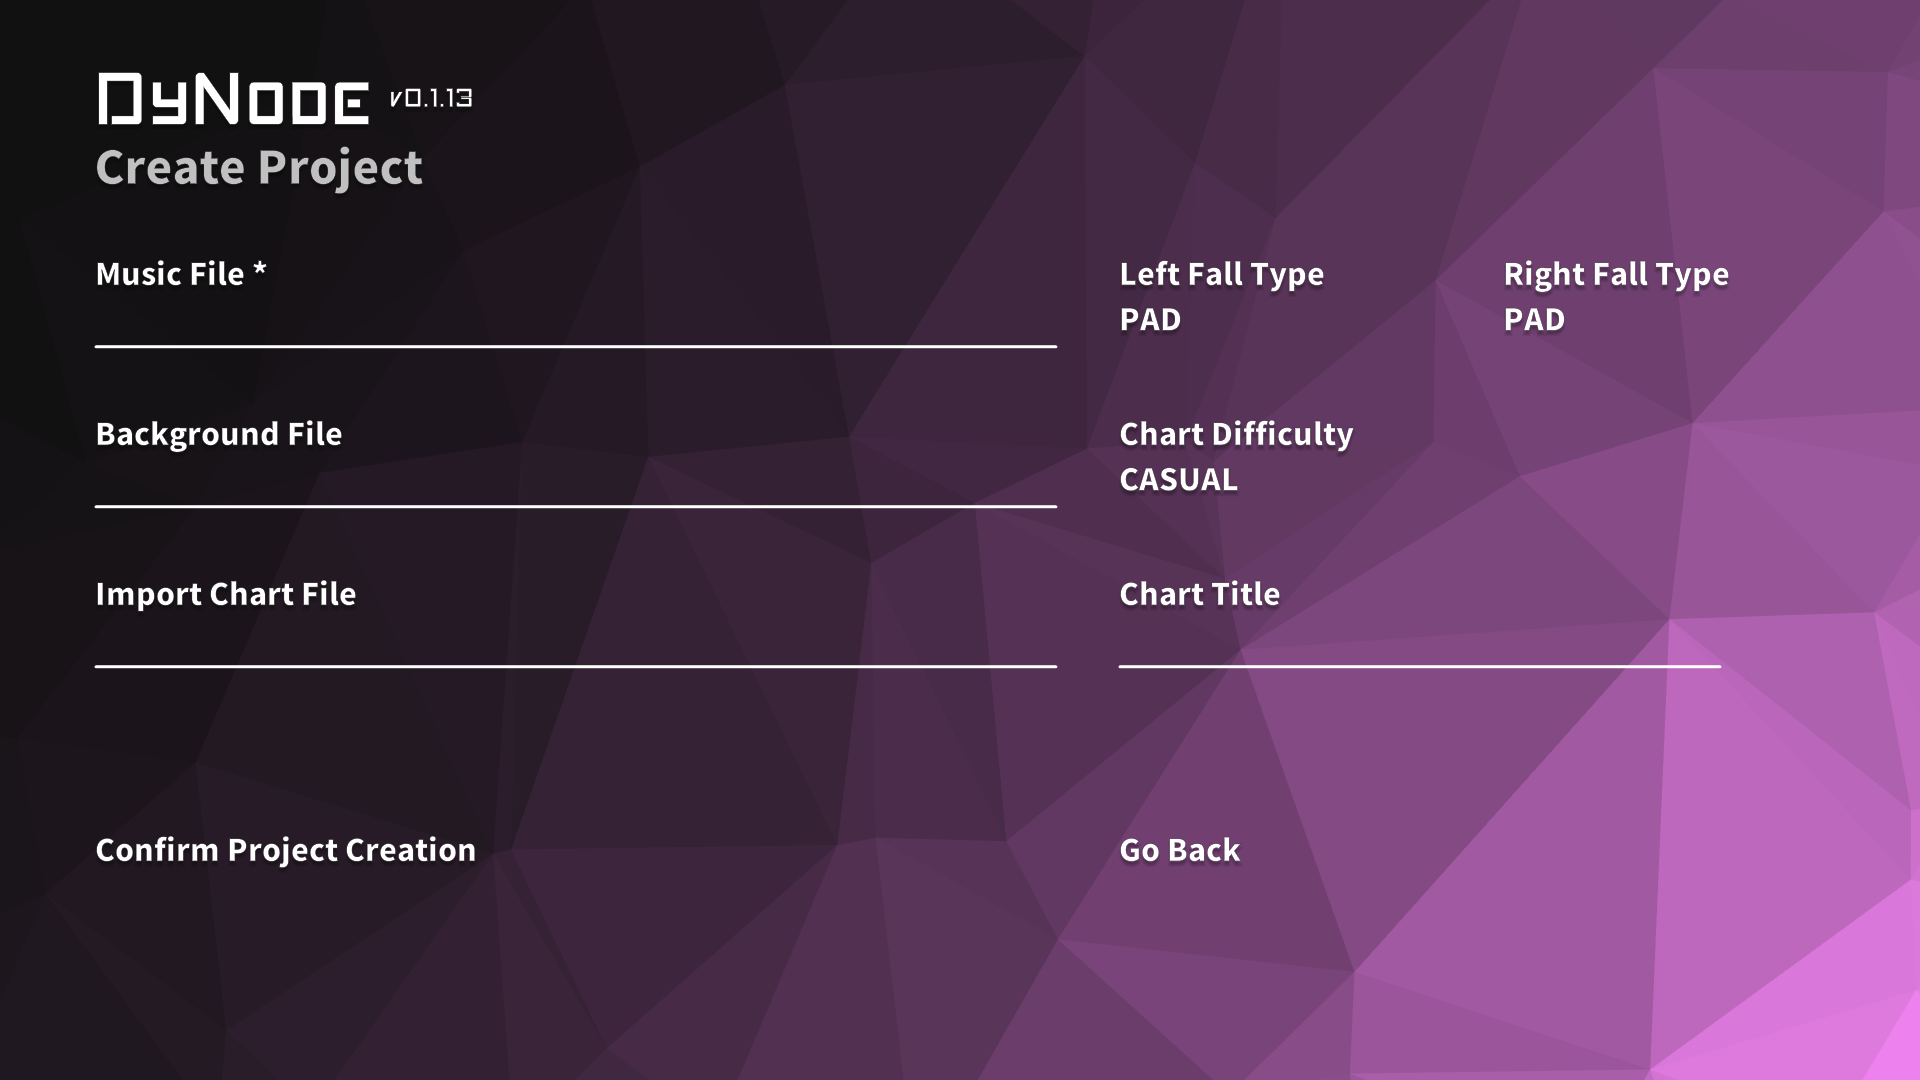
If you already have a chart being edited in Dynamaker, you can directly import it on the create project page.
At a minimum, you will need the following files:
- The music file for the chart. Most common music formats are supported (such as .mp3, .flac, .wav, .ogg, .mid, etc.). For details on delays with .mp3 and .wav files, see Timing.
- The chart file in .xml or .dy format (exported from Dynamaker). Generally, .dy files include the music file for the chart, so if you use a .dy file, you do not need to specify a music file.
Select your music file in the music file field. Choose your .xml file in the chart import field. If necessary, you may also add a background file. All configuration fields on the right will be overwritten by the imported chart information.
After filling in all the information, click Create Project to enter the editor.
Tips
Before editing the chart, make sure to correctly configure Timing.
Opening a Project
On the start screen, select “Open Existing Project” or press F1 in the editor to open an existing project.
Saving a Project
Press Ctrl+S to save your project.
Save Project As
Press Ctrl+Shift+S to save the project under a new name.